المشاركات

عرض المشاركات من فبراير, ٢٠١٨

How to Display Random Image from Folder in PHP

صورة
Hi! This is a quick tutorial about displaying random image from folder in php . It will be useful if you want to include featured section area on websites. Usually site owners will showcase their products or services in the prominent section with attractive pictures. And all these images will come from a folder and rotated through at regular time interval. A random image will be picked up from the lot one at a time and displayed here. Let's see how to implement this random image selection process. PHP offers a rich set of native functions to handle directory and files. And they are more than enough for the task we are going to do. PHP - Displaying Random Image from Folder: As for the process goes, we have to use scandir() function to read all the files from a given folder and make a random pick in the lot. Just follow the below steps to choose a random image file in a directory and display it on the browser. Step-1) First define the path to the image folder. $dir_path = ...
Upload Multiple Images & Files in CodeIgniter Example

صورة
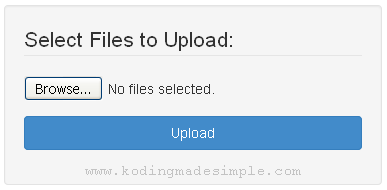
Hi! In this post, we'll see how to upload multiple images and files in codeigniter . Kodingmadesimple has a nice tutorial about codeigniter file upload process. Normal file uploading has a limitation which is you can only upload a single file/image at a time. What if you want to upload multiple files or images in codeigniter in one go? Is it possible to do that? The answer is YES! You can! Here I'll show you an example about multiple file upload in codeigniter. CodeIgniter Upload Multiple Files/Images: For this file uploading process you'll need a folder in the server to store all your uploaded files. Just create a folder named 'uploads' inside the application root and make sure to enable 'write' access to it. Next you need to create user interface to upload files. So create a code igniter view with a form and add file control & submit button to it. Set the name of the file field as array and add 'multiple' attribute to enable mult...

Simple Image and File Upload in CodeIgniter with Validations & Examples

صورة
Codeigniter provides a wide number of helper class and libraries for rapid application development. Upload library is one among them that makes file uploading process in Codeigniter a breeze. We'll see how to do file and image upload in codeigniter in this tutorial. File and Image uploading are similar since images are themselves files. But there are options for you to restrict the uploading process specific to images files alone and we'll see it below. File Upload in CodeIgniter First of all, we need a destination folder to store all the uploaded files. So create a folder named 'uploads' in the root folder. Make sure it is writable for the uploading process to work. Read Also: How to Create Login Page in CodeIgniter & MySQL How to Send Email in CodeIgniter using Gmail CodeIgniter Pagination System using Bootstrap Create Controller Create a controller file 'uploadfile.php' inside 'application\controllers' folder in codeigniter. ...

How to Download File from URL using PHP cURL

صورة
Hi! In this post, we will see how to download file from url using php curl . CURL is a great tool when it comes to remote communication. Using it, you can easily connect to a remote server and download files to your local machine. It allows to send http post request and get request in php as well. Executing a basic curl request will simply return the data to the output stream. But we don't want that. Instead, we must assign it to a php variable, which we can write it to the disk. Using CURLOPT_RETURNTRANSFER is the easiest way to copy remote files to our own. But there is a problem with this method. Below we will see the right way to download remote files with curl. PHP - Download File from URL using cURL: To download files from the remote url with curl, you have to follow the below steps: Create a writable file stream Pass the file handle to curl This will make cURL write the content downloaded directly into the file. Close the file handle. As I said earlier, using C...

How to Create Treeview with Bootstrap and jQuery

صورة
Hi! Today let's see about creating treeview using bootstrap and jquery . A Treeview is a tree like representation of elements in a hierarchical structure. It offers a quick and easy navigation through websites. Although there are several jquery plugins available for tree view that simplify the task, I wanted something that works well with bootstrap. And I found out a good library called 'Bootstrap Treeview' . It leverages the best of bootstrap framework and helps you display hierarchical tree structures using the JSON data set. You can do much more than a simple tree, like fetch data from the database and render a dynamic tree, make it collapsible, add icons , checkboxes and filters etc. Building Treeview with Bootstrap: Now let's see how to add treeview in bootstrap. To build the menu, we need three different libraries, Bootstrap CSS jQuery Bootstrap Treeview These libraries are available in the cdn, so you can load them directly on your projects without down...

CodeIgniter Autocomplete Search from Database using AJAX Example

صورة
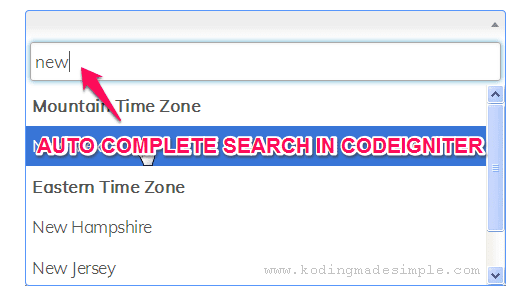
Hi! In this post, let's see how to autocomplete search from database using codeigniter and ajax . We are going to pull in live search thing something similar to Google search. As soon as you start typing in the textbox, the related suggestions will appear from the database. To implement this auto complete feature we need a jquery plugin called 'Select2'. Select2 is an excellent plug-in that supercharges the regular select box with search functionality . It's really inappropriate to make the end user to skim through hundreds of options to pick just one. With Select2 the entire process is a breeze. It adds up a search filter to the dropdown (select box), thus populating results on fly with the help of ajax. AJAX Autocomplete Search from Database in CodeIgniter: To implement the live autocomplete search in codeigniter, we need two JavaScript libraries, 1. jquery.js and 2. select2.js . Either download them or use from the cdn library just like I do in this demo. Jus...

How to Post JSON Data with PHP cURL & Receive It?

صورة
Hi! Here let's see how to post json data with php curl and receive the raw json sent . You can simply use PHP file_get_contents() to send HTTP GET request . But it's not the same case with HTTP POST. Fortunately PHP cURL makes the process very simple. With curl you can easily send HTTP requests. In case you don't know, 'cURL' is a library that let you communicate with web servers using different protocols such as http, https, ftp, telnet, file etc. To use curl, you must install libcurl package on your server according to the version of PHP you use. In case you are not sure if curl is enabled on your machine or not, use this code to check it. <?php echo (is_callable('curl_init') ? 'cURL is enabled' : 'cURL is disabled'); ?> How to Post JSON with PHP cURL? In order to send HTTP POST request with JSON data, you have to follow some steps and they are, Format JSON data correctly Attach JSON to the body of the POST request Set th...

jQuery Animated Typing Effect using Typed.js Plugin

صورة
Hi! Today, we are going to see an interesting tutorial, which is to animate typing effect using jquery typed.js plugin . Not all animations require the skill of a graphics artist. You can pull in some really cool animations just with jquery plugins. jQuery has its share of animation plugins and 'Typed.js' is one among them. It is simple, lightweight and let you add typing effect to web pages. The text will be typed literally character by character thus giving you the impression it is being typed on a terminal. Come, let's see how to implement this typing effect on websites. Adding Animated Typing Effect in jQuery: Typed.js is a jquery library to simulate the terminal typing effect that allows you to print plain text or html as if you were typing on the screen. How to Use it: First create a container to print the string. <div id="container"></div> Then call the function typed() on the container element that we have created and provide the str...