المشاركات

عرض المشاركات من نوفمبر, ٢٠١٧

How to Add Photo Frame Effect to Images using Pure CSS

صورة
Turn your plain website/blog images into an eye candy thing. CSS can be used to apply stylish image effects . Here is a pure CSS trick to apply photo frame effect to images . No need to completely rely on Photoshop to enhance the appearance of images anymore. Here are the advantages of using css for image effects: There is no need for any image processing software. No image customization required. This CSS style can be used to any image irrespective of its size and type. Don't want to worry about positioning the images; and it maintains the image aspect ratio. The CSS styles can be tweaked later to suit your needs without bothering the html pages. How to Create Photo Frame Effect with CSS? To pull off the photo frame image effect, we just wrap our <img> tag inside a <div> block. Add a background texture image using "background" property to serve as a photo frame. To make it realistic, we add some "box-shadow" which makes the edges...

10 Amazing CSS Drop Cap Effects you can Copy Paste

صورة
Hi! Today I have come up with some really cool and easy Drop Cap Effects using CSS. You can straight away copy paste the styles and use it, no tweaks required. Earlier we have tried some cool image effects . This time we are going to style the drop caps with few lines of CSS code. Drop cap is a large character at the start of an artilce, section or paragraph which is very common on publishing medias. We’ll take full advantage of CSS text-shadow property to style the drop caps. Come, let’s start exploring. How to Create Drop Cap using CSS? We can create a simple drop cap effect with first-child and first-letter pseudo elements. The HTML markup consists of no special code. Just we wrap a set of <p> tags within a <div> block. We want only the first line, first character to be a DROP CAP letter. We’ll add some basic CSS code to the <div> block to reset the default styles. CSS Code div {      margin: 0;     ...

Create Responsive Navigation Menu Bar with Twitter Bootstrap 3

صورة
We’ll see in this twitter bootstrap tutorial , how to create a simple yet elegant gradient responsive navigation menu with bootstrap css . Bootstrap has a built in navbar component and creating the navigation bar with it is relatively simple, provided you follow the right steps. By responsive we mean that the navigation bar adjusts itself to the available view port size. Say it will be extended to the full width when viewed in bigger screen like desktop/laptops and collapse itself to fit to the smaller screens of mobiles/tablets. Twitter Bootstrap Responsive Navigation Menu Bar Just take a look at the below image, which depicts clearly of how our navigation bar at the top looks on different devices . Recommended Read: 10 Amazing CSS Drop Cap Effects you can Copy Paste Plan Your Responsive Navigation Menu First we’ll plan the design of our navigation bar. Once we’ve planned, it will be easier to put it into action. For the demo, I’ve planned to create a navbar at the top o...

Twitter Bootstrap 3 Navbar with Dropdown Menu and Search Form

صورة
Hi, in the last post we've discussed about creating a simple responsive navigation menu with bootstrap 3 . In this post, we'll see another one interesting navbar tutorial in which we add dropdown menus and a search form to the right side of the navigation bar . Bootstrap comes with two different types of styles to create Navbar. One is the 'Default Navbar' and other is the 'Inverse Navbar'. I'll stick to the bootstrap class "navbar-inverse" for creating navbar, since I want the navbar to be in darker shade. Creating NavBar with Dropdown and Search box We'll use the built-in class "dropdown" to add dropdown menus to any first level menu item. Since it's a responsive navbar , it gets collapsed when viewed in mobile/tablets. To add a search form to the navigation bar, we add <form> element with class named "navbar-form" . Also we use the class "form-control" to design the form elements of the ...

How to Connect to Multiple Databases in CodeIgniter

صورة
Connecting to multiple databases is simpler in CodeIgniter . All you have to do is to establish a separate connection for each database you wish to work. At times you may want to work with multiple databases from same or different servers. In core PHP, you can do it by creating separate connection object. And in codeigniter you have to set up separate connection settings for each database you wish to connect. Here I'll show you how to connect with two MySQL Databases . Connecting to Mulitiple Databases in CodeIgniter 1. Open the "application/config/database.php" file. 2. You can see a list of default connection settings provided. Now enter the hostname, username, password, database & database prefix (if any) you want to connect. $db['default']['hostname'] = 'localhost'; $db['default']['username'] = 'mysql_username'; $db['default']['password'] = 'mysql_password'; $db['default']...

Create 3D Pie Charts with JavaScript and Google Charts API

صورة
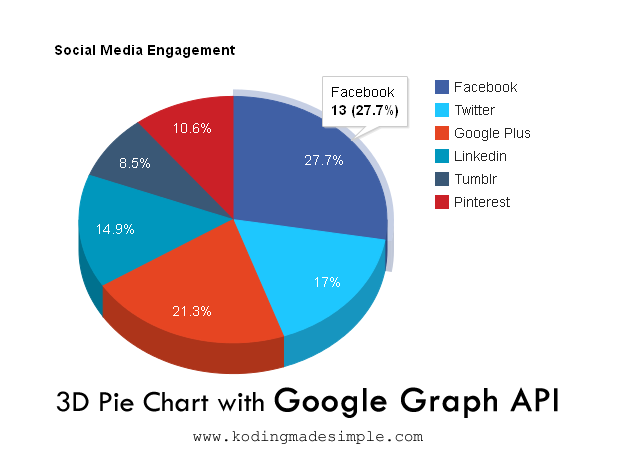
Google Charts API provides you with ready-made charts which you can generate with few lines of java script code. I'll show you here how easy it is to Create 3D Pie Charts with JavaScript and Google Charts API . For this chart tutorial we are going to use Google's Visualization API which is based on pure HTML5/SVH technology, so you don't need extra plug-ins. The pie chart we generate is an interactive chart , which means the user is allowed to interact with them by triggering events like mouse over, clicking, zooming, panning and much more (depends upon the charts we use). This method is relatively simple and does not require any complex server side scripts like PHP or any Databases. Using java script we will make callback to the Google Visualization API with the data set we want to render as a pie chart. The charts will be generated at the time of presentation. So if you want to generate charts from database tables , you can simply make it by querying the data...

Simple File Upload in PHP Example (SCRIPT)

صورة
Simple File Upload in PHP Example : File uploading is a much discussed topic on Web. It is one of the vulnerable spot of any website, and its security will be breeched if not handled properly. So understanding how to upload files in php in a secure way is a must for anyone who wants to learn php web development . No worries. This simple php file upload script will show you how to upload files using php more securely by providing appropriate filters. Before starting, just make sure if your web server allows file uploading. Check for this line in the server's php.ini file. file_uploads = On If it is not set, then set it to 'On'. Simple File Upload in PHP Example: First let's create the html form for uploading the file. Add a file input and a submit button to the form. The file input is made especially to aid file uploading process, which comprises of a text box and a browse button. The user should click on the browse button to choose the file for uploadi...

Image Lightbox Effect with jQuery

صورة
LightBox is a popup window that is used to open up images , html contents & other multimedia stuffs. This effect can be produced with css and js but using addons will simplify the task. In this tutorial I will show you how to add such lightbox effect to images with a jQuery plugin , called FancyBox. FancyBox plugin lets you produce clean and elegant lightbox effect with smooth animations. Download the latest version of the plugin here , extract the contents and move the folder 'source' to your working folder. Add Image LightBox Effect using jQuery First we need to include the required js and css files. FancyBox plugin is built over the jQuery library so we should load the jquery file first for the plugin to work. Recommended Read: How to add Photo Frame Effect to Images using pure CSS <!-- include jQuery library --> <script type="text/javascript" src="js/jquery-1.10.1.min.js"></script> <!-- include fancyBox JS and CSS fil...

Stylish Bootstrap Sidebar Menu Example

صورة
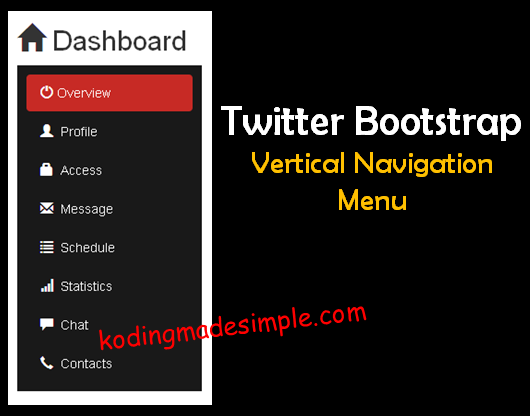
Bootstrap Sidebar Menu Example: Earlier in one of our tutorials we've discussed about Creating Bootstrap Horizontal Navbar . In this tutorial we'll see how to create sidebar menu in bootstrap . The Bootstrap Sidebar Menu or otherwise called as Bootstrap Vertical Navigation Menu is a list of menu items or links, stacked vertically. It can be placed left or right hand side of the website. Apart from the appearance, it is very similar to horizontal menu and is used to provide easy way of navigation through the website. Bootstrap Sidebar Menu Example For this tutorial, we build a customized Dashboard Menu with Bootstrap . This Dashboard Menu (i.e, bootstrap vertical navigation bar) is going to contain a list of stacked up links along with suitable icons to each item in the list. To add menu icons we use Glyphicons. Glyphicons is the icon font that comes with Bootstrap3 and is present inside the 'font' folder of Bootstrap files. Recommended Read: Add Search F...

How to Fetch Data from Database in CodeIgniter

صورة
How to fetch data from database in codeigniter? CodeIgniter is the simplest and light PHP framework which lets you create robust web applications in no time. Using Twitter Bootstrap with CodeIgniter saves the hassle of writing CSS Stylesheets for your app and lets you focus on development. Later you can customize bootstrap styles to suit your need. That is the best part of using MVC pattern as the presentation (view) is separate, you can change the look and feel of the app anytime without disturbing the rest of it. kodingmadesimple.com have good amount of twitter bootstrap tutorials about customizing bootstrap 3 and I recommend you to go through our bootstrap tutorials section. Fetch Data from Database in CodeIgniter: Now we'll see how to read data from MySQL Database and display it in a neat table format with Bootstrap. Since we are going to use bootstrap we don't want to write any custom stylesheets for formatting the display. If you are not familiar with using B...